Showing posts with label blogger tips. Show all posts

Using the Blogger iPhone App

1

Labels: ,

I have been waiting for a while or blogger to release an app for the iPhone to do my blogging from. I have periodically checked back in to the App Store to see if they developed anything, but it wasn't until today that I found one there. I'm not sure how long it has been available, but I am really glad it's out.... Or so I thought...

The reviews I have read are mixed, but sadly most of the latest reviews from January 2012 and newer are almost all negative. It appears the app crashes often, and doesn't have much to offer outside of posting a basic text-only post. I'll give it a shot, but if it continues to be a problem, I'll just go back to posting via email. It's a pretty consistent option that seems to work without a hitch, and allows me to attach pictures in a post just like the app does.

how to remove auto "read more" function from blogger template

0

Labels:

I have found that many of the free templates I start with when designing a blogger site have the "feature" of showing every post with a "read more" option. In many situations, I do not want to use this feature. However, I have also found it very difficult to remove. Perhaps this can be of help to you.

This method will not work with every blogger template. But this tutorial will help you to remove auto read more feature from many templates you can download from free sites.

Before doing this change,I highly recommend to backup your blogger template first.

Login to your Blogger Dashboard --> Design --> Edit HTML.

Click on "Expand Widget Templates".

Now use the Edit --> Find function from your browser, and search for code within your template that looks like this


If you cannot find that exact matching code, search for some portion of it. What I find to get me in the right area, is searching for "createSummaryAndThumb" this gets me in the vicinity of what I need to look for.

After that, it becomes a trial and error exercise. If you do have the entire code from above, simply replace it with the following code


If not, begin reading through the code looking for the beginning and ending parameters surrounding the "createSummaryAndThumb" with a little luck, and some time, you will delete out the necessary code. You will know you have it right, when you can click "Save Template" with an error message. Be sure to examine your site afterwards for random peices of code you may have missed.

Good luck!

Teaching an Old Blogger Dog New Tricks

0

Labels:

This week I spent some time building a client a new website this weekend. Lately I have been spending most of my social media consulting time dealing with new twitter practices, and new iPhone apps that connect people.

But I love the creative side of building a new website. It's rewarding. Now don't get me wrong, I am still not creating blogger templates from scratch. I'm not that talented, and there are plenty of resources out there to get a template started. A simple google search will find you a number of options.

Yet, each blog or website I design has to be manipulated to match the needs of the person or business. For me web design is a lot about trial and error. I can never quite be sure that what I am reading in HTML really translates to what the reader will see when the site goes live.

Today I discovered a website that would show me what the HTML code for each color is. It's not that the site was hidden. All I had to do was google what #ffffff was. It was showing up in my HTML code in the incorrect places. I learned that #ffffff is a light gray color.

In fact, every website has a color schematic running behind the scenes that determines what the font color, and background colors look like. Change the number code, and change the color. It was a great find.

For some of you, this is web design fundamental. The idea that someone like me has been devising websites for 5 or more years without ever learning that little trick is very disappointing.


However, this is why I find the web and social media so intriguing. We all have very different entry and exit points on and off the Internet superhighway. Each of our experiences on the web are very personalized to our specific needs from the Internet.

Knowing this is a good reminder for me. It helps me keep in mind that every reader, every follower comes to the site from a different angle.

Managing that type of dynamic is impossible. But knowing that it does exist should determine some choices we make on design ideas, and writing content.

how to put pay pal on your website

0

Labels:

People have asked me about using paypal on their websites. For churches, it really is a great option for online giving, because its a service that doesn't cost you anything to offer, unless it is used. Right now it charges 2.9% per transaction and $0.30. So, if I give 100 bucks through pay pal the church only receives $98.60 of the offering. That is not too bad, but if someone were to give $1,000, the church would only receive $987.70. In this case, you would want them to use a different payment method. For us, paypal catches a few people who would not otherwise give. Some college students who have graduated and moved away still continue to give via paypal every month. Most regular givers use a different method.
1. Go to http://www.paypal.com.

2. Sign up for an free account if you don't have one yet. Just follow the instructions and you will do all fine.

3. Once your PayPal account is active, log in.

4. Go to the Merchant Tools section. Look for the Accepting Website Payments section. Click then on a link called Donations.

5. Provide the information that is asked to set up your donation button.

6. You can also add more options, such as providing a thank you page, cancellation page and some other stuff.

7. Ready? Then click on Create Button Now.

8. Copy the HTML code and paste it on your blog or website template.

9. Now you just have to encourage your readers to use your donation button to send their donations.
Feel free to comment with any questions you may have!

How to keep putting out good content...

0

Labels:

This is really hard for all of us. We all want to come back to websites again and again that make us laugh, make us think, or even the ones that make us angry. But finding a way to be the person who writes these type of blog posts is a very difficult task. Here is one way I have begun doing it.

I use Google Toolbar. All the time. One of the features of the toolbar is that you can click it and see what you searched for the last 20 times or so. I find that good blog posts tend to answer good questions. By looking at my own search entries, I am reminded of the questions I have been asking for the last few hours, few days, or few weeks. If I am asking these questions, than other people are probably asking them as well.

Then, I need to decide whether I think I have something to offer as the "authority" on the subject, or if I want to write a post culminating my findings to the question I have been asking all week. The reality is, I very rarely feel like I can speak as the "authority" on any subject. The result is, I write posts like this one. Posts that are influenced by articles like this one, or this one, or this one, and especially articles written by this guy.

How to Consolidate RSS Feeds and Bring them into Facebook

0

Labels: ,

I have been looking for a way to link multiple RSS feeds into my twitter feed, which I am sending over to facebook, as a facebook status update. I stumbled across this video, which explains in great detail how to make this possible. I was already a big fan of Google Reader, and this really helps me out!

Have Fun!

Google Analytics - New Bloggers, You Need To Read This!

0

Labels:


I recently began using Google Analytics to the list of things I use from the Google Dynasty. I have had the account set up for months now, but didn't realize how efficient it really is. After reading a post by Tony Morgan I decided to check out what stats I had been missing.


In a 24 hour window, here is what Google can tell me.


I can tell, even with this tiny snapshot, that my primary reading audience is finding their way to my site via Facebook. (Another good reason to import your blog into a facebook account.)


If you are serious about blogging, you must focus on your visitors. This is an incredible tool to see who those visitors are, and how they are arriving at your site.


Quick Guide to Google Analytics

I found these directions at MamaBlogga while there are many sources for info on the subject, her approach is very helpful, without all the technical jargon. Enjoy!


Before you say: “Oh, numbers; I can’t deal with numbers!” or “Oh, coding; I can’t deal with coding!”, let me tell you that these numbers are good to know—and very useful in growing your blog readership. And let me tell you that these numbers are easy to find, use and understand with a free web analytics package (software installed on your site that tracks what visitors do on your site)—no coding, just cut and paste.


There are many free web analytics packages out there. In my opinion, Google Analytics offers the most comprehensive solution. It may be a little overwhelming for someone just starting out, but it’s really not hard to find the most important numbers you need to be keeping track of. Click on the picture at right to enlarge it to see a sample of some of the important, but easy to read, reports that Google Analytics generates.


Setting Up Google Analytics


Google Analytics is easy to set up. If you’re signed up with GMail, Google Talk or Blogger (or any other Google application), you already have a Google account. (If you don’t, you can sign up for one pretty quickly.) To sign up for Google Analytics, you’ll have to enter your information (URL, location, your name, etc.) and agree to the user agreement.
Once you enter this information, Google Analytics gives you some crazy-looking tracking code that you must put on your website.

This should go in your template somewhere in the footer. If you’re on Blogger, you can go to Layout, and click on “Add a Page Element” at the bottom of the sample page. Select HTML/JavaScript. Make sure you are not in “Rich Text” mode, then paste your tracking code here. No need for a title, just save it to your blog. Go back to Google Analytics and verify that it’s running by clicking the “Check Status” button.

Customizing the Dashboard
Once you’re collecting data from your site, Google Analytics can be even more useful to you if you customize the “dashboard” to include the most important reports to you. The dashboard is the first screen you see when you login, and you can choose which reports are displayed there so you see them first thing.


In the above screen shot (actual numbers obscured), you can see that I have the basic reports (this is all below the visitor graph displayed at the top of the dashboard), and have added a keywords report so I can see what words people are using on search engines to find my site and the Top Content by Title report so I can see at a glance which pages on my site are getting the most visitors. I recommend these two reports, since they’re easy to use and understand (not to mention their usefulness!).
The Keywords report is under Traffic Sources>Keywords. To add it to the dashboard, click the “Add to Dashboard” button under the large title “Keywords” near the top of the page. The Top Content by Title report is available under Content>Content by Title. You can add it to the dashboard in the same way. You can delete and drag-and-drop the boxes in the lower part of the dashboard to how you like it.
Also useful (but already included on the dashboard): Average time on site (are people popping in quickly or sticking around at least long enough to read something?), pages per visit (do people look at more than one page while at your site?), bounce rate (how many people leave your site after viewing only one page?) and the traffic sources pie graph. I also like to look at my top referrers (under Traffic Sources>Referring Sites) to know where my visitors are coming from.
Using the Information
Well, now what? You can see the words that people use in search engines to find your site; you can see how long they spend there; you can see how many pages they view. What can you do with this information?
First of all, you can see what pages of your site are most popular. From this, you may be able to tell what topics and style your readers like best—of, if you did something special to promote your most popular posts, you can see what you need to do again.
Secondly, you can see how many of your visitors turn around and leave. In and of itself, bounce rate isn’t necessarily bad. Unlike many websites, it’s entirely possible for visitors to your blog to visit your site and read everything new in a single visit, then navigate away (possibly to subscribe to your feed). But do your popular pages have a higher than average bounce rate?
If your popular posts have a higher than average bounce rate, what can you do to improve that? Make sure that your most popular posts also highlight similar posts on your site. For more information on lowering your bounce rate and increasing your blog’s stickiness, download the free guide Get Your Visitors to Stick!
Another important use of your analytics is to see what sites and keywords people are using to find your site. You may never know what people are searching for when they find your site. However, if you see large trends that are central to the theme of your blog (like many people coming to your photography site for some variation of “baby portrait”), you could try to “target” this keyword more by:
Making it a label, tag or category on your blog
Making it part of the navigation, like your About or Contact page
Including it in the Title or Description of your blog
Writing a post that sums up (and links to) all your tips (if you do this, be sure to go back through the old posts and link to the new one, as well).
Finally, try not to worry too much about your blog stats. It’s so easy to become obsessed with your blog’s stats, and to tie your blog’s worth or even your own self-worth to the number of page views you generated yesterday. It’s not worth that much—really.
Download this Quick Guide to Google Analytics for Bloggers, complete with helpful pictures, as a free PDF!

Learning to blog post via email address

0

Labels:

I am testing out something new (for me) today, which is a post from my gmail account. Why would someone want to do this you might ask? Well, if I can post with an email, it means that anything I get in an email, I can just forward on to my blog if I choose. It also means I can use an automated email service to post for me if I choose to do so. Ultimateley, I have found that keeping up with a blog can be a time consuming task. But, if the posts are kept very regular I find my readers to stop by my blog more often, and are more likelt to subscribe to my RSS feed. The best way for me to keep up with this is to have multiple options for posting.

1. Post at http://www.blogspot.com/
2. send a picture text message to go@blogger.com
3. send a text message to go@blogger.com
4. send an email to go@blogger.com

Any other options you are aware of?

Here is how I set it up.
1. I sent this email (learning to post via email address) to go@blogger.com

2. I received an email reply that looked like this:
Welcome! xxxxxxx.blogspot.com is your blog. Claim it at go.blogger.com with code: XXXXXXX

3. I went to go@blogger.com and put in my token claim code I had just received

4. Mobile Blog Found
Congratulations, you have created a blog with your mobile device. Now you may access additional settings, options, and features available from Blogger.com.

Welcome Back!
You are logged in as xxxxxx@gmail.com .
Continue as this user Sign out and continue as another user
I selected "continue as this user"

5
Claim Mobile Blog
Your mobile posts are are being sent to xxxxxx.blogspot.com/. Would you rather have them sent to one of your existing blogs?
From there I selected to send my posts to Milo Wilson

6. Click Finish - YOUR DONE!


Adding Twitter Feeds to Your Blogger Account

0

Labels:

This should not be nearly as hard as it turns out to be. But I tried using the Feed widget supported by blogger, but I never could get it to update in a reasonable amount of time. The new widgets offered by blogger are cool, but they are often suited better for iGoogle rather than a blogger acount. I found the following video, which helped me get on the right track.


RSS reader look here to see video

After that, I found the http://twitter.com/badges/blogger page which walks you through the whole process. Hope this helps you!

how to transfer a blog from one account to another (on blogger)

0

Labels:

Through the process of learning a great deal this week about hosting blog sites, I found that I would have to move a blog over to a new user. How do you do this? Check out the instructions below

This works, it's safe, and it's simple. You always have at least one administrator. You can't short this procedure. You will, of course, have to have both accounts active for some time. Don't start this if you've lost the account name, or forgotten the password, on one of the accounts. Plan this process with some care.

Note that you may perform some or all of these steps. Some steps may be performed by another person while you observe, or distant from you, at your discretion.
If the new owner isn't already a blog member

Login to the blog, using an account that currently has administrative access. From Settings - Permissions, add a new blog member, using a suitable email address used by the person being given access.

Login to Google, under the email account targeted in step 1. Open the email received, and accept membership, using any valid Google account. Or setup a new Google account, if necessary. Note that the email account used initially, and the Google account may, or may not, be the same.

Login to the blog, using an account that currently has administrative access. From Settings - Permissions, make the new member an administrator. Be careful, and only add administrators who can perform reliably.

If you're transferring ownership, not adding an administrator
Login to the blog, using the account that was just given administrative access. From Settings - Permissions, remove the old account. Using the account that was just added, to remove the old account, assures you that the account just added now has administrative authority.>>

(Note 1): If you're doing this in preparation to switching your Blogger, GMail, or other email account, do not discontinue the current account until you have executed, and tested, step 2.Remember, though, that you can only login to one Google account at a time, from a single computer. If you have other abilities setup on the current Google account, you'll be constantly logging off and onto each account, as you switch back and forth.>>

(Note 2): Remember that Google authenticates using one account, for multiple tasks (Blogger, Google Apps, Google Mail, and others), using cookies. Be sure to clear cache and cookies (both cache and cookies, and the two are not the same), at the end of the procedure above. If you use one computer for all steps, you'll be logging off one account and onto another; in that case, you will want to clear cache and cookies after each step. Take it slowly and carefully.

Going to a Blog format for the church website

2

Labels:

I am sorry I have been away from the blog for a few days. I have been doing some research in the website development department. We are considering a blog format for our entire church website. Is this a good/bad idea? Do you personally know of any sites that are doing this? Link me up!

How do I import blog posts into FaceBook?

6

Labels: ,

My good friend Jeremy asked me this question: "I'm trying to figure out how to get my notes or blogs imported onto facebook. How do you do it?"


I had to look around a little to get directions that make more sense than what mine would be. I got this info from AskOwen


Importing your blog posts into FaceBook is really easy .. once you know how. Here’s how to do it:
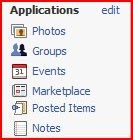
First of all you’ll need to log into FaceBook. Do this in the normal way, then have a look at the screen youare presented with. If you look on the left hand side of your screen you’ll see a menu list of different Applications you have associated with your account. This starts off as a simple list, but as you add more Applications the list will grow longer. Your application list can be quite long, but one of the options in the menu is called Notes and this is the one you’re after. Click on this to proceed to the next step.


Your Notes page will show you a number of different notes that your contacts might have added to their profile (or nothing if you don’t have many friends). This will include both Notes typed on FaceBook and also posts from their blogs if they are using this technique. Don’t worry about what’s on this page for now, just look on the right hand side of the page and you’ll see a section called Notes Settings. Look for a link that says Import a blog and click this to proceed to the next step. You will then be presented with the following form:


Enter the URL to your blog in the text box. It doesn’t need to be your RSS feed, as FaceBook will figure this out on it’s own. You’ll have to tick the disclaimer underneath the URL and then just click Start Importing.


You’re done! I told you it wasn’t hard!

Is your blog confusing?

0

Labels:

I had a rare opportunity this weekend to watch my father-in-law experience my blog page for the first time. Here are a few things I learned from just watching him.

He couldn't find anything.
He just wanted to read my posts. He wasn't interested in my RSS feeds.
He didn't have any way to see what topics I write about most.
He saw the search option , but didn't know what to search for.

Look for some changes around here as I try to simplify.

Are you too close to something to see what the "normal" person sees?
Find someone who can see it for what it really is... mush... then fix it.

Unleash - 10 Steps to Blogging BFFs

0

Labels:

These were taken directly from my notes in Tony Morgan's communications/blogging breakout.

10 Steps to Blogging BFFs (Best Friends Forever for those of you who are text messaging illiterate)

1 Determine your primary audience
2 Post regularly (almost daily)
3 Keep your posts short (people are busy)
4 Don't sell yourself short (be real, be honest)
5 Use humor (dig yourself instead of others)
6 Stop attacking other people and their ministries
7 Remember that blogging isn't private (someone might actually read what you write)
8 Be a thought leader (give us your thoughts, not someone else's)
9 Don't listen to your critics
10 Reveal the real you (do duct tape if that's what you know)

A second list of ten I find very interesting is Tony's 10 Easy Ways to Keep Me from Visiting Your Church Because I Visited Your Website you should definitely read this guy!